Day 15.
本系列同步發表在 第11屆鐵人賽
GitHub API 初體驗
本人在這專案之前是完全沒使用過 GitHub API 的,所以我是以新手之姿來串接它。
如果有理解錯的,希望大家留言告訴我囉~
目前我使用步驟是
- 首先要有個 GitHub 帳號(廢話)
- 再到個人的設定頁面拿 Personal access token,開發測試時使用。
- 最後拿 token 就可以對接 GitHub REST API v3 了。
小提醒:
倉庫頁 - 改
接下來我們就直接實際上使用看看。
我先在創建一個新的檔案 lib/services/github_api.dart
import 'package:flutter_dotenv/flutter_dotenv.dart';
import 'package:github/server.dart';

GitHub githubClient = GitHub(
  auth: Authentication.withToken(DotEnv().env["GITHUB_PERSONAL_ACCESS_TOKEN"]),
);
主要目的是要宣告出一個全域變數 githubClient,方便後續其他頁面也能使用。
這裡和作天一樣我創建了 fetchRepos() 函數,裡頭來獲取我個人的所有 repo。
接著在 initState() 函數裡將 fetchRepos() assign 給 repoList,這樣前置作業就算完成拉~
最後比較複雜的部份,我選擇使用 Flutter 原生提供一個方便的 Widget – FutureBuilder。
將最主要的內容部份以這個 Widget 來作些改寫,先來看看程式碼。
...

  @override
  Widget build(BuildContext context) {
    return Scrollbar(
      child: RefreshIndicator(
        child: FutureBuilder(
          future: repoList,
          builder:
              (BuildContext context, AsyncSnapshot<List<Repository>> snapshot) {
            switch (snapshot.connectionState) {
              case ConnectionState.done:
                if (!snapshot.hasError) {
                  return ListView.separated(
                    padding: EdgeInsets.all(0.0),
                    itemCount: snapshot.data.length,
                    itemBuilder: (BuildContext context, int index) {
                      return ListTile(
                        title: Text(
                            "${snapshot.data[index].owner.login}/${snapshot.data[index].name}"),
                        subtitle: Column(
                          crossAxisAlignment: CrossAxisAlignment.start,
                          children: <Widget>[
                            SizedBox(height: 8.0),
                            snapshot.data[index].description != null
                                ? Text(snapshot.data[index].description)
                                : Text("No description provided."),
                            SizedBox(height: 8.0),
                            Text("★ ${snapshot.data[index].stargazersCount}"),
                          ],
                        ),
                        trailing: snapshot.data[index].language != null
                            ? Text(snapshot.data[index].language)
                            : SizedBox(),
                        contentPadding: EdgeInsets.symmetric(
                            vertical: 8.0, horizontal: 16.0),
                        onTap: () {},
                      );
                    },
                    separatorBuilder: (BuildContext context, int index) =>
                        const Divider(height: 0.0),
                  );
                } else {
                  return Center(child: Text("No Data"));
                }
                break;
              case ConnectionState.none:
              case ConnectionState.active:
              case ConnectionState.waiting:
                return Center(child: CircularProgressIndicator());
            }
          },
        ),
        onRefresh: () async {
          await Future.delayed(Duration(seconds: 1));
          setState(() {
            repoList = fetchRepos();
          });
        },
      ),
    );
  }

  Future<List<Repository>> fetchRepos() async {
    ...
  }
程式碼看起來很長,但最主要的概念就是我將原本 ListView.separated 的部份包進了 FutureBuilder 裡。
而使用 FutureBuilder 有兩大重點:
* future 屬性需要帶入你要執行的異步任務(這裡就是指獲取 repos)
* builder 屬性需要填入你所想要創建的內容,而執行異步任務完的結果,可以在函數第二個參數 AsyncSnapshot snapshot 來作使用。
小提醒:
- 使用
FutureBuilder其實還有一個好處,可以在build裡面處理snapshot.connectionState,比如有 連線異常 或 載入資料中的情況,能直接用 switch case 切換 Widget 來表示這些狀態。- 在開發途中發現如果搭配
FutureBuilder的話,RefreshIndicator.onRefresh的使用上需作些修改。(參考: HOW TO REFRESH FUTUREBUILDER ON BUTTON CLICK IN FLUTTER)- 關於 Personal access token 我使用
flutter_dotenv這套件來載入我的.env設定檔,主要是為些安全上作考量囉~
–
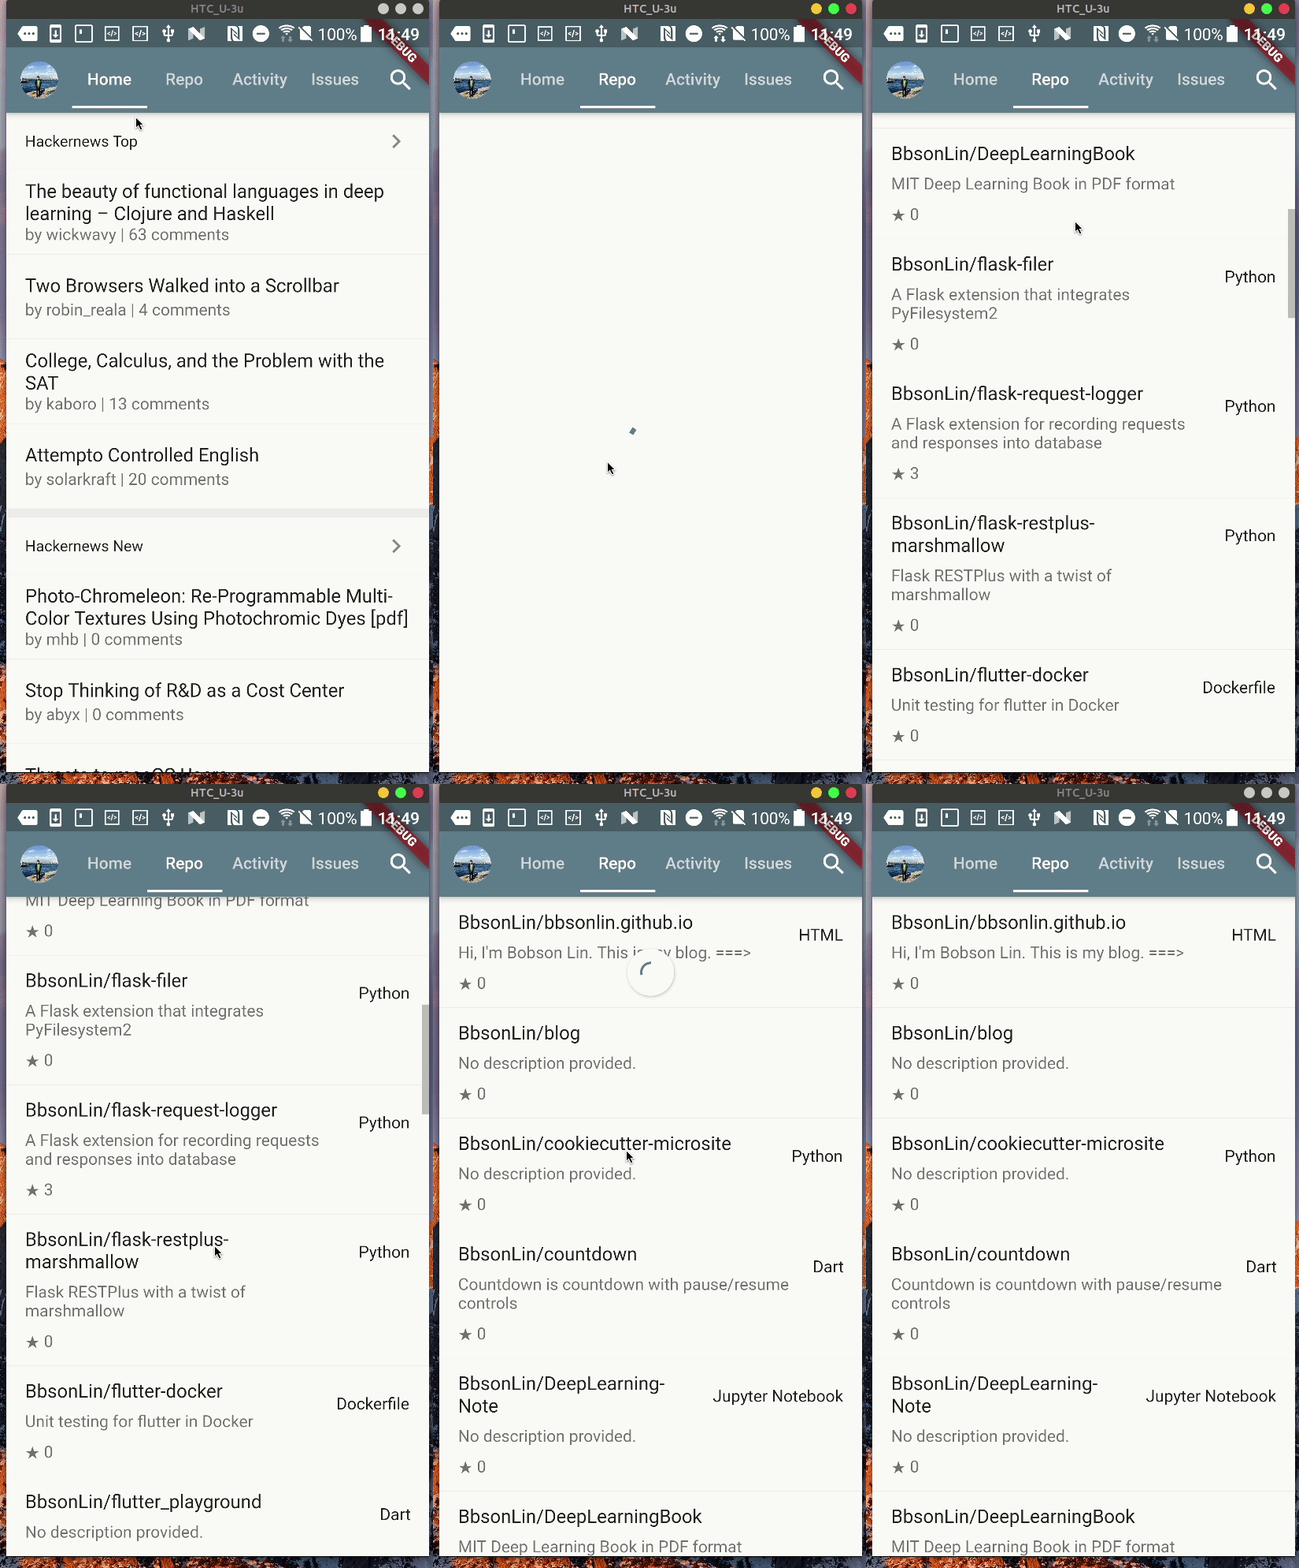
成果
–
鐵人賽默默的也過了一半了~
這幾天小弟較忙,原諒小弟今天先以簡短的內容做收~
