安裝
筆者的環境使用 Ubuntu 18.04,利用 pipenv 安裝 opencv-python 套件
起步 - 照片(影像)
import cv2

img = cv2.imread('data/messi5.jpg', 0)
cv2.imshow('image', img)
k = cv2.waitKey(0)
if k == 27:         # wait for ESC key to exit
    cv2.destroyAllWindows()
elif k == ord('s'):  # wait for 's' key to save and exit
    cv2.imwrite('out/messigray.png', img)
cv2.destroyAllWindows()- 用
cv2.imread讀取影像檔案,第一個參數為檔案位置(String);第二個參數為讀取影像檔的顏色參數。 - 第二個參數有很多選項,如
cv2.IMREAD_COLOR、cv2.IMREAD_GREYSCALE、cv2.IMREAD_UNCHANGED… 更多 - 用
cv2.imshow可顯示用cv2.imread讀取進來的影像資訊 cv2.waitKey會等待任何鍵盤事件;cv2.destroyAllWindows會關閉所有視窗。- 按下鍵盤
s,會調用 cv2.imwrite 存處理後的 img 圖檔 - 相關 API 文檔 reading and writing images、user interface
# Use matplotlib
from matplotlib import pyplot as plt
plt.imshow(img, cmap='gray', interpolation='bicubic')
plt.xticks([]), plt.yticks([])  # to hide tick values on X and Y axis
plt.show()- 也可以使用
matplotlib做顯示,預設會有放大縮小、存檔功能。
起步 - 影片
import cv2

cap = cv2.VideoCapture('data/vtest.avi')

while(cap.isOpened()):
    # Capture frame-by-frame
    ret, frame = cap.read()

    # Our operations on the frame come here
    gray = cv2.cvtColor(frame, cv2.COLOR_BGR2GRAY)

    # Display the resulting frame
    cv2.imshow('frame', gray)
    if cv2.waitKey(1) & 0xFF == ord('q'):
        break

# When everything done, release the capture
cap.release()
cv2.destroyAllWindows()- 利用
cv2.VideoCapture建立影片擷取物件,利用cap.read()可以將影片一幀一幀讀取進來作顯示。 cv2.VideoCapture可接受影片檔或者影像裝置的輸入。cv2.cvtColor可以轉換每幀進來的影像顏色基調;這裡使用cv2.COLOR_BGR2GRAY,轉換基調的參數非常多(參考)- 最後記得需要
cap.release()釋放物件。 - 相關 API 文檔 reading and writing video、miscellaneous transformations
畫畫函數
import cv2
import numpy as np

# Create a black image
img = np.zeros((512, 512, 3), np.uint8)

# Draw a diagonal blue line with thickness of 5 px
cv2.line(img, (0, 0), (511, 511), (255, 0, 0), 5)

cv2.rectangle(img, (384, 0), (510, 128), (0, 255, 0), 3)

cv2.circle(img, (447, 63), 63, (0, 0, 255), -1)

cv2.ellipse(img, (256, 256), (100, 50), 0, 0, 180, 255, -1)

pts = np.array([[10, 5], [20, 30], [70, 20], [50, 10]], np.int32)
pts = pts.reshape((-1, 1, 2))
cv2.polylines(img, [pts], True, (0, 255, 255))

font = cv2.FONT_HERSHEY_SIMPLEX
cv2.putText(img, 'OpenCV', (10, 500), font, 4, (255, 255, 255), 2, cv2.LINE_AA)

cv2.imshow('image', img)
k = cv2.waitKey(0)
if k == 27:         # wait for ESC key to exit
    cv2.destroyAllWindows()
elif k == ord('s'):  # wait for 's' key to save and exit
    cv2.imwrite('out/draws.png', img)
cv2.destroyAllWindows()- Opencv 畫圖形的函數內建的函數滿充分的,跟很多繪圖的程式庫都滿像的,若要用的話可詳讀文檔。
- 相關 API 文檔 drawing functions
用滑鼠當筆刷
import cv2
import numpy as np

drawing = False  # true if mouse is pressed
mode = True  # if True, draw rectangle. Press 'm' to toggle to curve
ix, iy = -1, -1
ox, oy = -1, -1


def draw_circle(event, x, y, flags, param):  # mouse callback function
    global ix, iy, ox, oy, drawing, mode

    if event == cv2.EVENT_LBUTTONDBLCLK:
        cv2.circle(img, (x, y), 100, (255, 0, 0), -1)

    if event == cv2.EVENT_LBUTTONDOWN:
        drawing = True
        ix, iy = x, y

    elif event == cv2.EVENT_MOUSEMOVE:
        if drawing:
            if mode:
                cv2.rectangle(img, (ix, iy), (x, y), (0, 255, 0), 3)
            else:
                cv2.circle(img, (x, y), 5, (0, 0, 255), -1)

    elif event == cv2.EVENT_LBUTTONUP:
        drawing = False
        if mode:
            cv2.rectangle(img, (ix, iy), (x, y), (0, 255, 0), 3)
        else:
            cv2.circle(img, (x, y), 5, (0, 0, 255), -1)


# Create a black image, a window and bind the function to window
img = np.zeros((512, 512, 3), np.uint8)
cv2.namedWindow('image')
cv2.setMouseCallback('image', draw_circle)

while(1):
    cv2.imshow('image', img)
    k = cv2.waitKey(1) & 0xFF
    if k == ord('m'):
        mode = not mode
    elif k == 27:
        break

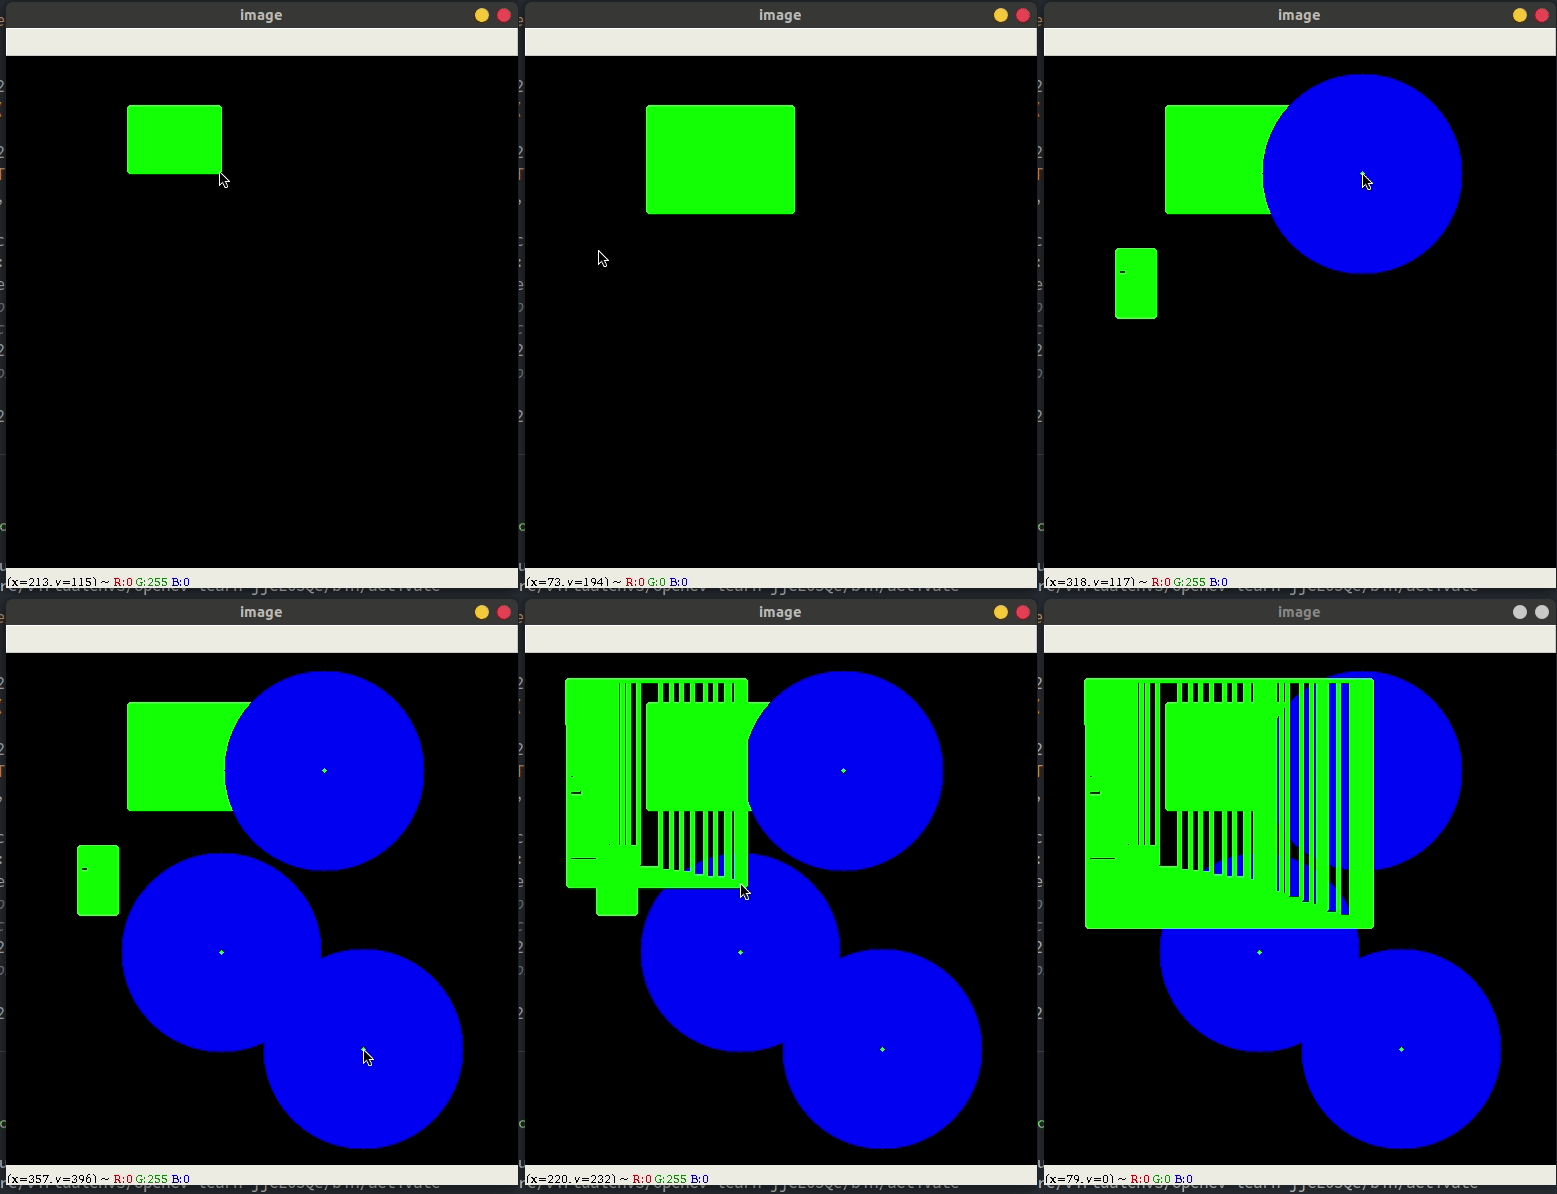
cv2.destroyAllWindows()- 用
numpy套件,np.zeros來定義畫布視窗的矩陣。 cv2.setMouseCallback中第二個參數onMouse可以監聽視窗的滑鼠事件並調用回調函數。draw_circle函數內利用event判斷之後再調用畫畫函數來達成像小畫家的筆刷功能。- 相關 API 文檔 drawing functions、user interface
- 結果:

滑動軸來控制調色盤
import cv2
import numpy as np


def nothing(x):
    pass


# Create a black image, a window
img = np.zeros((300, 512, 3), np.uint8)
cv2.namedWindow('image')

# create trackbars for color change
cv2.createTrackbar('R', 'image', 0, 255, nothing)
cv2.createTrackbar('G', 'image', 0, 255, nothing)
cv2.createTrackbar('B', 'image', 0, 255, nothing)

# create switch for ON/OFF functionality
switch = '0 : OFF \n1 : ON'
cv2.createTrackbar(switch, 'image', 0, 1, nothing)

while(1):
    cv2.imshow('image', img)
    k = cv2.waitKey(1) & 0xFF
    if k == 27:
        break

    # get current positions of four trackbars
    r = cv2.getTrackbarPos('R', 'image')
    g = cv2.getTrackbarPos('G', 'image')
    b = cv2.getTrackbarPos('B', 'image')
    s = cv2.getTrackbarPos(switch, 'image')

    if s == 0:
        img[:] = 0
    else:
        img[:] = [b, g, r]

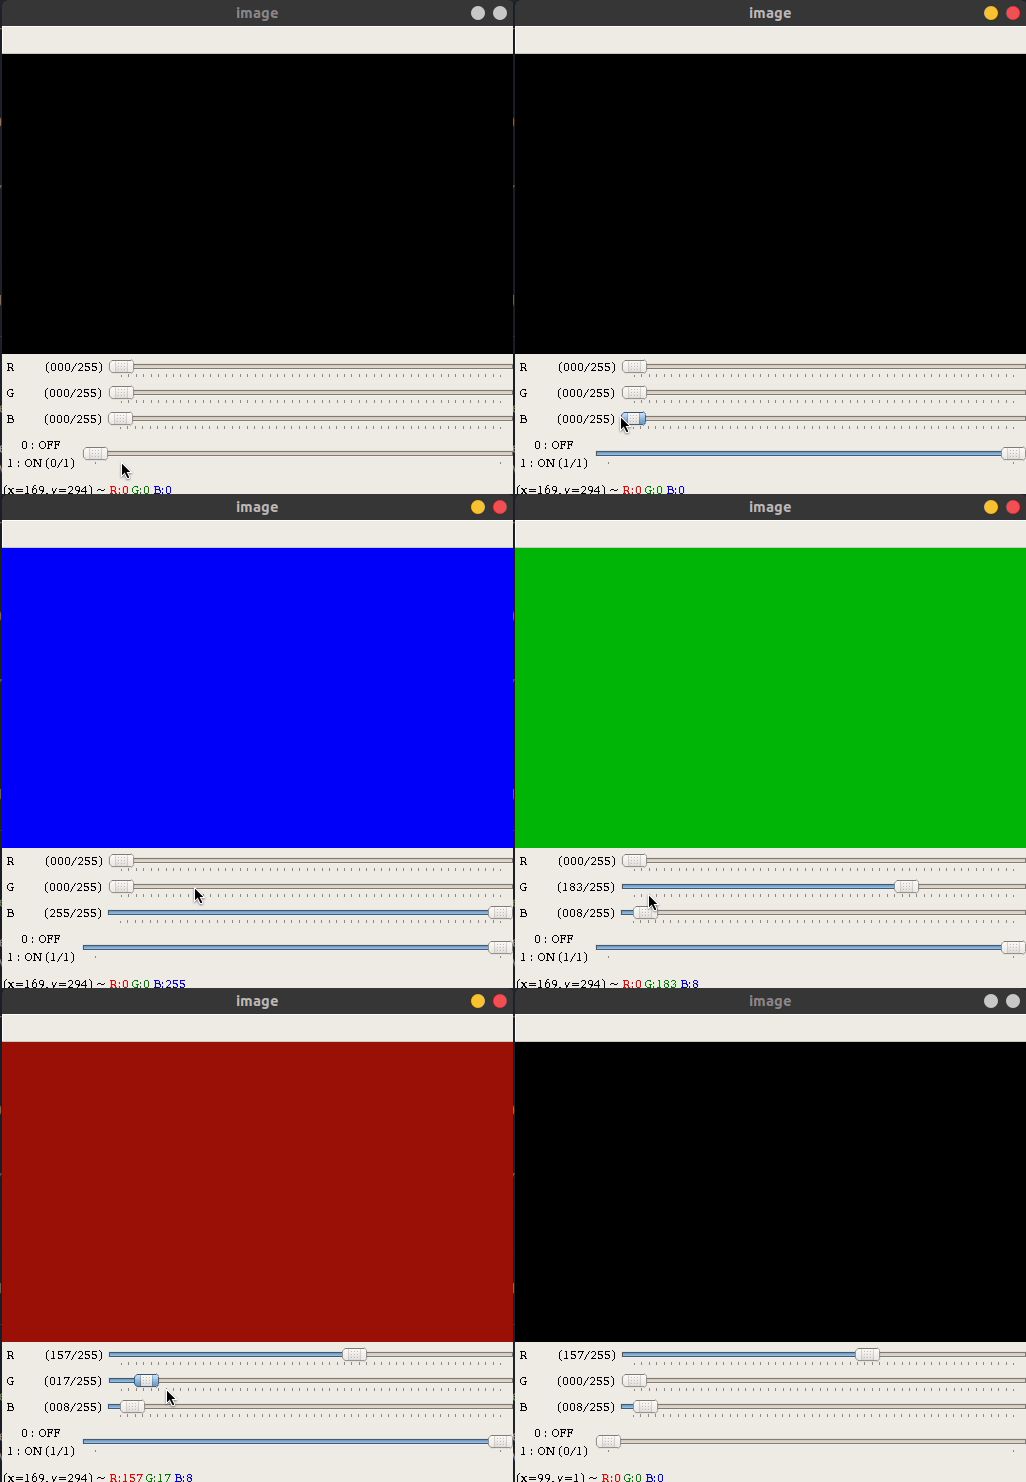
cv2.destroyAllWindows()cv2.createTrackbar創建滑動軸,cv2.getTrackbarPos獲取滑動軸的數值;用來更新視窗的點陣矩陣img[:] = [b, g, r]。- 相關 API 文檔 user interface
- 結果:

你也可以瞧瞧…
參考
系列文